
How to Use Digital Twins to Plan Your Lab: A 5-Step Guide
Labs are in constant motion. They are relocated to optimize space, new instruments arrive and need a home, and core facilities expand into adjacent rooms. Yet most labs still plan these changes with static floor plans, scattered spreadsheets, and institutional knowledge. Mistakes only become visible after the move is done. Here’s how to use a digital twin to plan your lab instead, step by step.
Build a virtual replica of your lab as it will be, not just as it is
The first step is getting your lab into a digital environment. With Hopara’s web interface, this doesn’t require CAD expertise: import your floor plan, then use simple drag-and-drop operations to place equipment, define benches, and draw room boundaries.
The point isn’t to document the current state, it’s to create a sandbox where you can safely explore the future state. Every layout idea, expansion scenario, or equipment move can be tested here first.
Populate it with realistic 3D models of your equipment
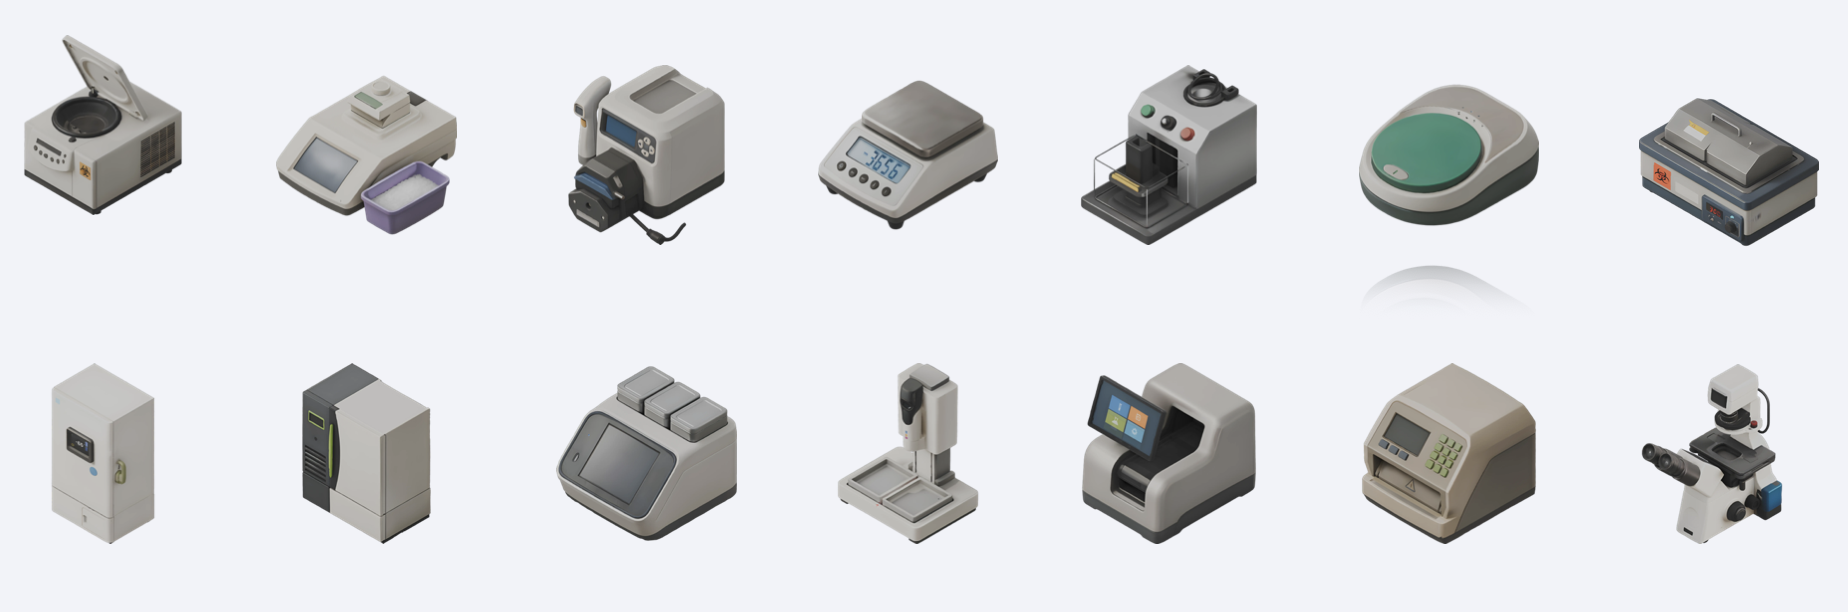
A plan you can’t visualize is a plan you can’t validate. Hopara ships with an extensive library of over 1,000 lab equipment models: centrifuges, incubators, biosafety cabinets, freezers, and more so your virtual lab actually looks like your lab.
For new or unusual instruments that aren’t in the library, the picture-to-3D feature generates a 3D model from a single photo, and an AI agent searches for the equipment’s real dimensions. That means even equipment that hasn’t arrived yet can be placed, to scale, in your plan.
Make every mistake on a screen instead of on the floor.
Map your workflows in the layout
A lab layout isn’t good or bad in the abstract it’s good or bad relative to the work that flows through it. Once your equipment is placed, map your key workflows onto the floor plan: the sequence of instruments and locations each protocol touches, from sample prep to analysis.
Hopara visualizes these workflows as paths across the lab, with distances calculated for each. Suddenly the abstract question “is this a good layout?” becomes concrete: how many meters does a scientist walk to complete this assay? Which steps force people to cross the entire building?
Test layout scenarios until the plan is validated
This is where the digital twin earns its keep. Reroute workflows, redraw room boundaries, swap instrument positions, and simulate expansion into adjacent spaces, each scenario tested in minutes.
Every decision gets validated in the twin before it costs anything in the real world. And because the plan is visual, stakeholders scientists, facilities, leadership can all review the same layout and give feedback on something concrete instead of an abstract spreadsheet.
Execute the move and keep the twin alive
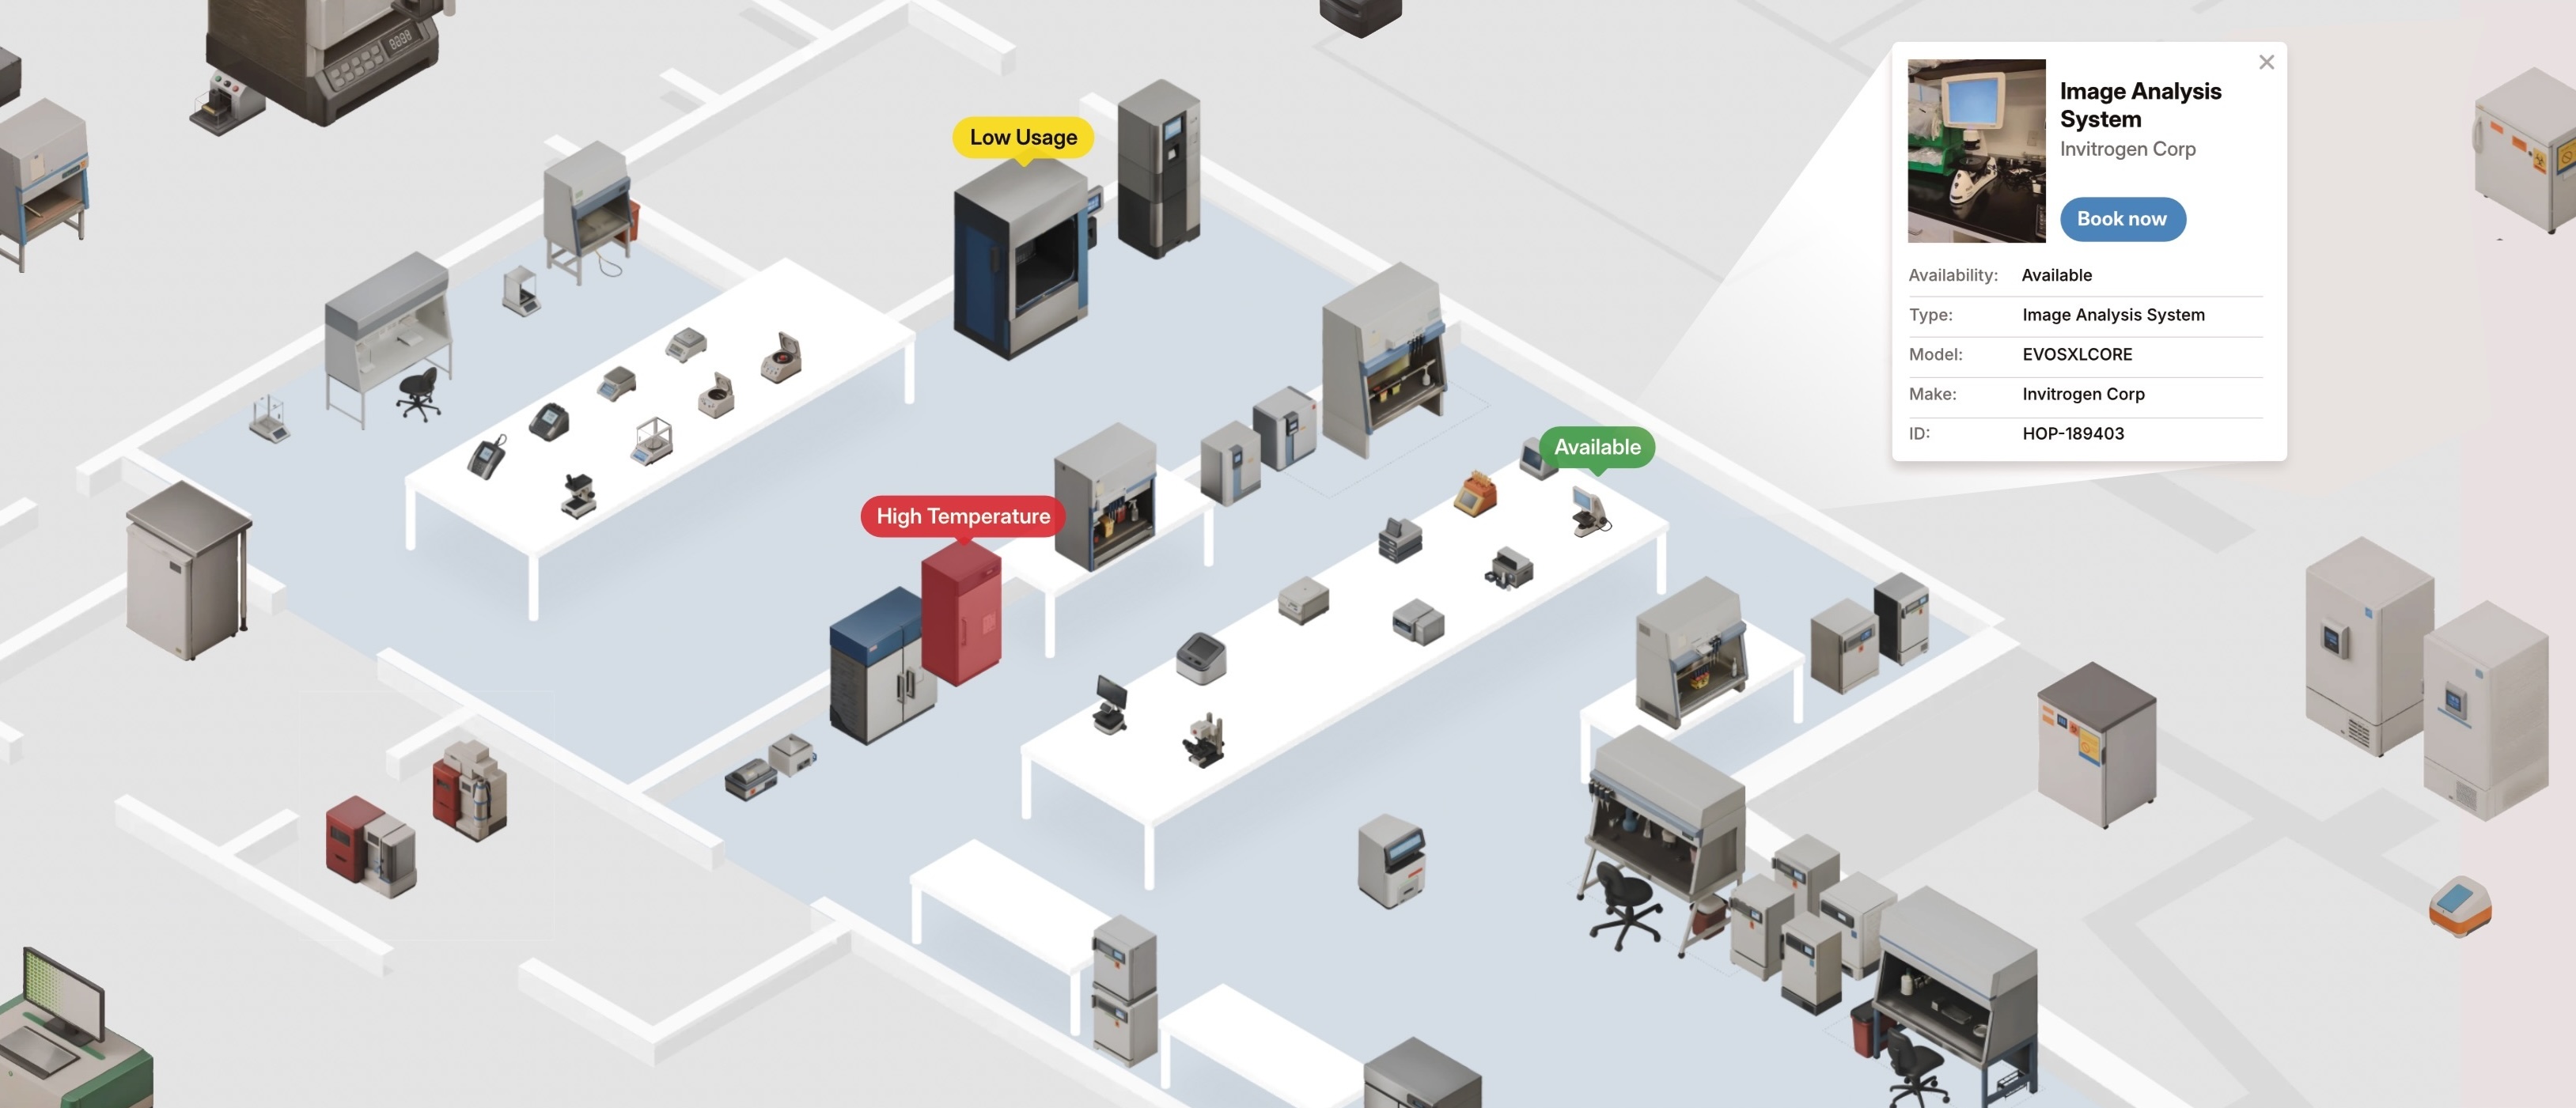
When the physical lab finally takes shape, it matches what you already validated. No surprises, no expensive corrections after the fact.
But the digital twin’s job doesn’t end when the move is done. The same model becomes your operational interface: live equipment status, utilization tracking, asset location, and monitoring so the next reorganization starts from an up-to-date picture instead of another round of spreadsheets.
Plan your lab with confidence
Place equipment, map workflows, and validate your layout before a single instrument moves or a wall goes up.